Opencti Homelab Deployment With An Intel Nuc
Over the past month, I’ve been introduced to a bunch of threat intelligence tools and resources, and one question has been floating around my head: How the hell do I homelab this? Many companies take out the hassle of the backend, but I am a glutton for punishment.

Two open-source platforms that have caught my attention are OpenCTI and MISP. Like all my other homelab experiences, troubleshooting is inevitable. I’ll cover MISP another time, but deployment is relatively simple compared to OpenCTI. This is to help that fellow tinkerer who has hit a wall, and the resources I found don’t cover this type of deployment.
I am a fan of as small as possible, especially after buying a beefy enterprise server that makes my electric bill want to throw up. So, this deployment is an NUC. I went with an Intel NUC 12 Pro with 32GB RAM, 1TB SSD, and an Intel Core i7–1260P CPU. These types of deployments require an x86 processor, making this ideal for a miniature server.

The TL;DR is that this CPU architecture determines how your computer runs and if you don’t have it…it no worky
Two open-source platforms that have caught my attention are OpenCTI and MISP. Like all my other homelab experiences, troubleshooting is inevitable. I’ll cover MISP another time, but deployment is relatively simple compared to OpenCTI. This is to help that fellow tinkerer who has hit a wall, and the resources I found don’t cover this type of deployment.
I am a fan of as small as possible, especially after buying a beefy enterprise server that makes my electric bill want to throw up. So, this deployment is an NUC. I went with an Intel NUC 12 Pro with 32GB RAM, 1TB SSD, and an Intel Core i7–1260P CPU. These types of deployments need an x86 processor, so this is ideal for a miniature server.
Let’s get to it. I decided to turn on the Hyper-V feature on my NUC. It should come with Windows 11 Pro, allowing you to enable this feature. I won’t go into the details of installing Ubuntu on Hyper-V because there are plenty of resources, including ChatGPT. But all you need is the ISO from Ubuntu. After the installation, we will need to install Docker. You want to follow these directions for the prerequisites. As for cloning the repository, I recommend something akin to this:
1
2
3
mkdir -p /opt/opencti && cd /opt/opencti
git clone https://github.com/OpenCTI-Platform/docker.git
cd docker
MAKE SURE YOU ARE IN /opt/opencti/docker (my screenshots have “OpenCTI”. Linux is case-sensitive so you can name that folder whatever, but ultimately you want to be in that docker folder)
Before installing anything from that directory, install python3-pip (sudo apt install python3-pip). This was one of the things I didn’t have installed, and I spent the better part of an hour fixing it. As the documentation suggests, you can either rename the file .env.sample as .env. I recommend making a copy:
1
cp .env.sample .env
Then follow something like this (with whatever text edit tool. I used Sublime):
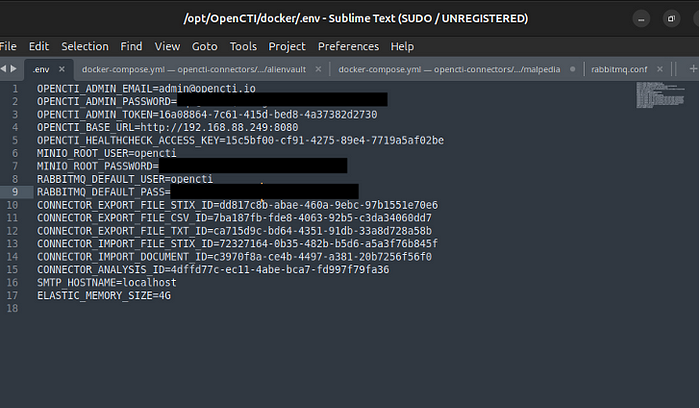
Use the UUID Generator for the OPENCTI_ADMIN_TOKEN and it is suggested to use the IP of the VM for OPENCTI_BASE_URL. Use whatever passwords you see fit.
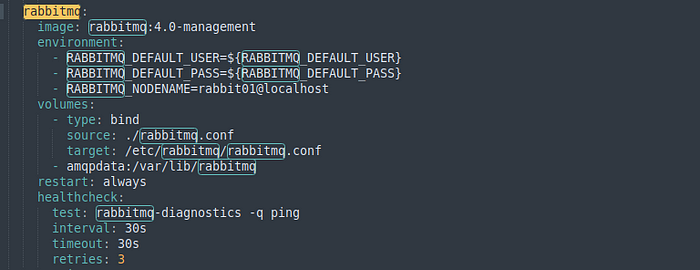
Next, you will also need to edit docker-compose.yml (and it won’t be the first time ;).
Edit the RabbitMQ service.
Seriously, edit the volumes section to match this. Otherwise, you will spiral into why the OpenCTI won’t install.
Now that you have followed the directions, all you have to do next is the command sudo docker-compose up -d (and you are still in /opt/open/docker). If you follow the directions, you will see OpenCTI installed. Unlike me, I saw it installed, but the RabbitMQ service wasn’t, so I had to troubleshoot. But, if you see all services installed, you will see this:
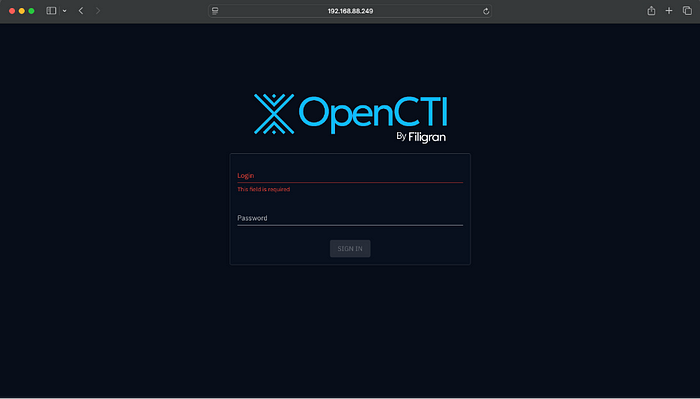
Congratulations! You installed OpenCTI! But you will find that it is mostly empty, mainly because there is a Part II. Building those connectors that supply the threat feeds.

You want those sweet Malpedia feeds? Or AlienVault OTX? What about MITRE? Those luxuries don’t come out of the box. You must build those connectors on the very compose file we edited for RabbitMQ.
Fortunately, there is a repository that has docker compose files that you can copy and paste onto your docker-compose.yml for OpenCTI (the one in opt/opencti/docker). I made a separate folder for the connector repo:
1
2
3
mkdir -p /opt/opencti-connector && cd /opt/opencti-connector
git clone https://github.com/OpenCTI-Platform/connectors
cd /connectors/external-import
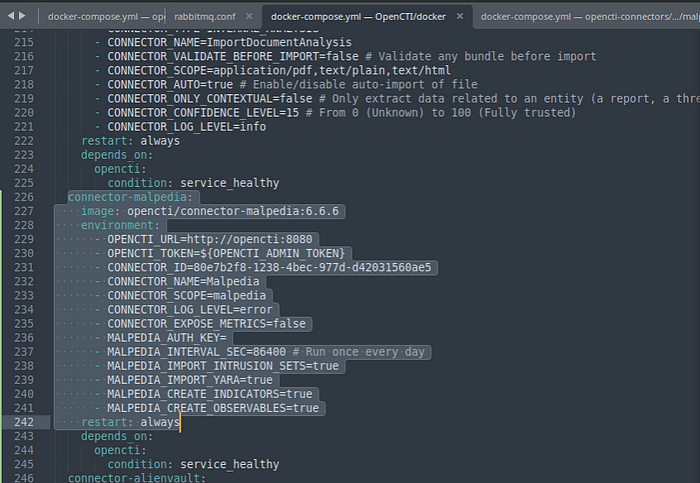
You can choose whatever connectors you want but there are certain things you need to do within those docker-compose.yml. I created connectors for Malpedia, MITRE ATT&CK, and AlienVault. Here is an example of Malpedia. Ensure the OPENCTI_URL=http://opencti:8080 otherwise your container will go into an infinite restart loop. Generate a UUID for the CONNECTOR_ID.
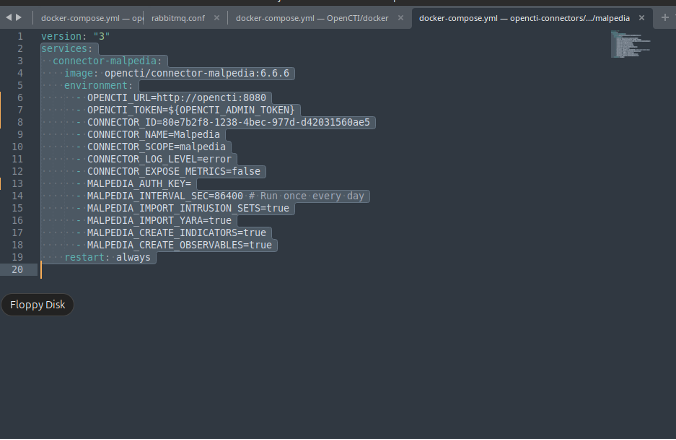
After that, copy from services down and paste it near the end of the docker-compose.yml file for OpenCTI (/opt/opencti/docker).
Add the depends on: opencti: and condition for your connector. Add the rest of your desired connectors. After you have pasted your connectors into the docker-compose.yml file, use the docker-compose up -d command while still in the /opt/opencti/docker directory. You should see the connectors being installed. Use the docker-compose ps command to ensure the connectors are running.

It won’t look like that exactly, but you want the State to be Up. Restarting is an indicator that there is an issue. You may need to review logs for your connector with docker logs -f your_connector_name. It will take some time for the connectors to ingest and populate data, but you should see something like this.
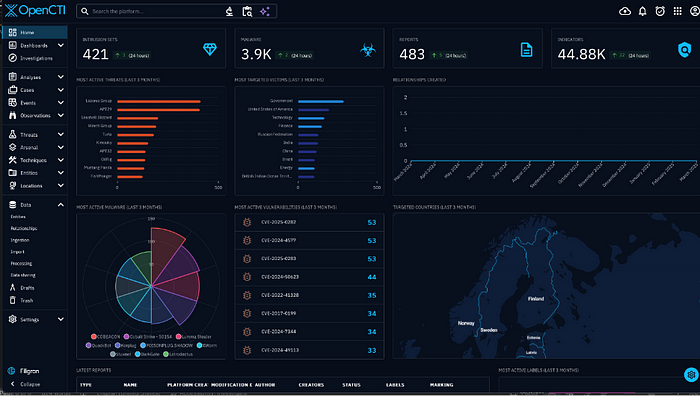
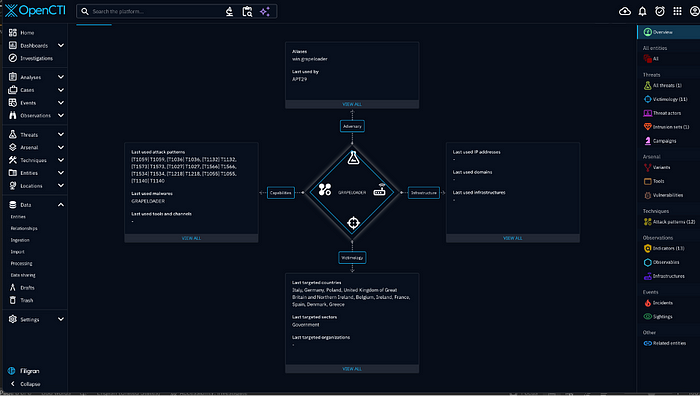
Currently, it is very noisy, but you can make dashboards for relevant threats. What you can do now is search keywords such as a malware. For example, GRAPELOADER.
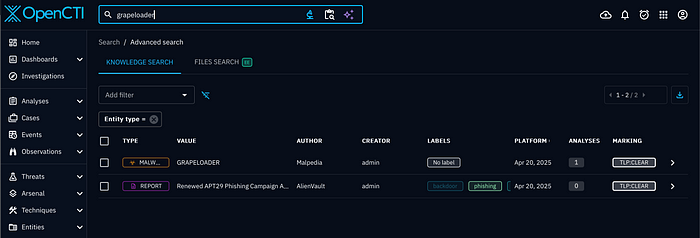
We got the malware and a report from two of our connectors Malpedia and AlienVault. But say you want Indicators of Compromise. Click on the Malware result, and you will get details.
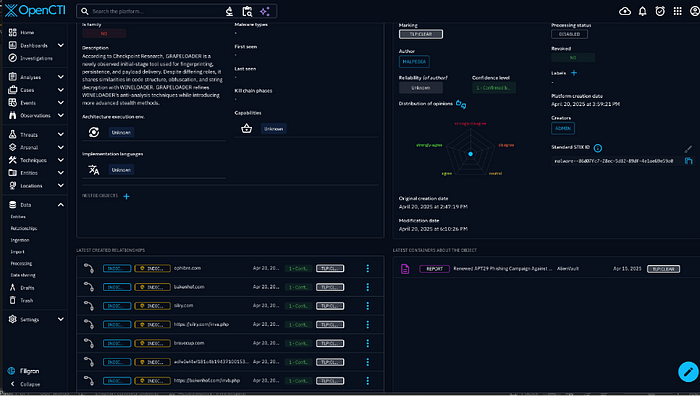
OpenCTI will create connections and even a Diamond Model to work off.
So, we have some exciting results and pivot points on one platform. I’m excited to incorporate this into my homelab and do some good ol’ threat hunting.